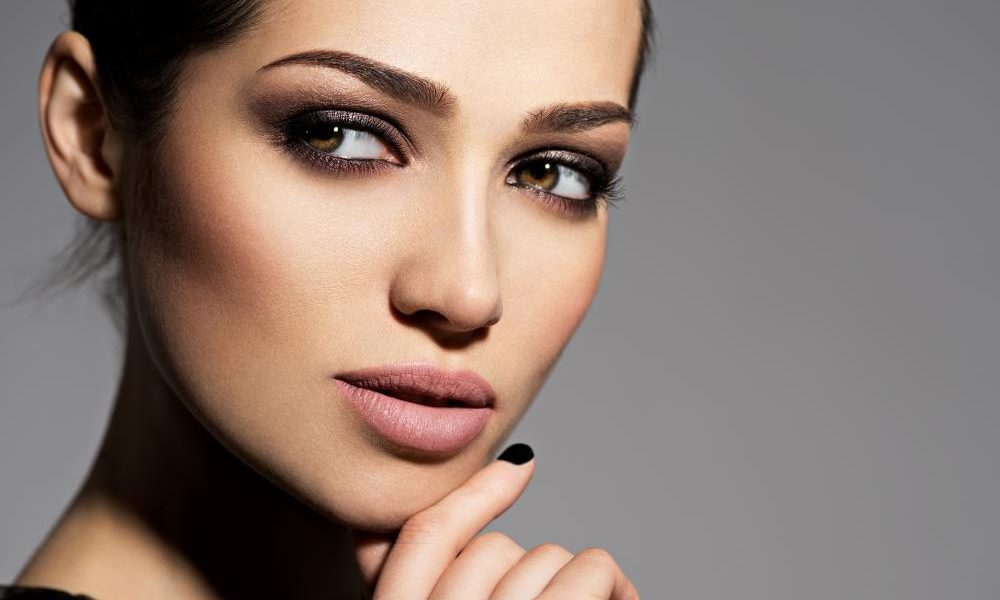
A smoky eye is a timeless makeup look that exudes confidence and allure. It can be intimidating for beginners, but with the right techniques and a bit of practice, anyone can master this glamorous look. Here’s a step-by-step guide to achieving a perfect smoky eye, along with some expert tips and personal anecdotes to make the process enjoyable and straightforward.
Step 1: Gather Your Tools and Products
Before you start, make sure you have the necessary tools and products:
- Eyeshadow primer
- A light, medium, and dark eyeshadow (neutral shades like browns and grays are great for beginners)
- Eyeliner (black or dark brown)
- Eyeshadow brushes (a flat shader brush, a blending brush, and a smudge brush)
- Mascara
- Highlighter
Tip: Invest in good quality brushes. They make a significant difference in the application and blending of your eyeshadow.
Step 2: Prepare Your Eyelids
Start by applying an eyeshadow primer to your eyelids. This will help your eyeshadow last longer and prevent it from creasing.
When I first started experimenting with smoky eyes, I skipped the primer step and found my eyeshadow creasing halfway through the day. Once I started using a primer, my makeup stayed put all day long.
Step 3: Apply the Base Color
Using a flat shader brush, apply a light eyeshadow all over your eyelid, up to the brow bone. This will create a smooth base and make blending easier.
Quote: “The key to a smoky eye is to layer and blend. Start with a light wash of color all over the lid, then gradually build up the intensity with darker shades.” – Alex Box, Makeup Artist & Creative Director of Illamasqua (Source: Illamasqua)
Step 4: Add the Mid-Tone Shade
Next, take a medium eyeshadow shade and apply it to the crease of your eye using a blending brush. Blend it well to create a seamless transition between the base color and the mid-tone.
Tip: Use a windshield wiper motion to blend the eyeshadow into the crease. This technique helps to diffuse the color and avoid harsh lines.
Step 5: Deepen the Outer Corner
Now it’s time to add depth to your smoky eye. Apply a dark eyeshadow shade to the outer corner of your eyelid using a smudge brush. Blend it inward towards the center of your eyelid and slightly into the crease.
Quote: “A smoky eye can be adapted to any eye shape or occasion. For a daytime look, keep it soft and subtle. For a night out, amp up the drama with a bolder color and more intense blending.” – Hannah Martin, Makeup Artist & Brand Ambassador for Bobbi Brown Cosmetics (Source: Hannah Martin Instagram: @hannahmartinmakeup)
I used to be afraid of dark eyeshadow, thinking it would make my eyes look too harsh. But with proper blending, I discovered it adds the perfect amount of drama without overwhelming my eyes.
Step 6: Line Your Eyes
Using an eyeliner pencil, line your upper lash line. For a more intense look, you can also line your lower lash line. Then, use a smudge brush to blend the eyeliner, softening the line for that smoky effect.
Quote: “A smoky eye doesn’t have to be black. Experiment with browns, grays, or even jewel tones for a unique twist.” – Priscilla Ono, Global Makeup Artist for Fenty Beauty (Source: Priscilla Ono Instagram: @priscillaono)
Step 7: Blend, Blend, Blend
Blending is crucial for a flawless smoky eye. Use a clean blending brush to blend all the eyeshadows together, ensuring there are no harsh lines. The goal is to create a gradient effect from the lightest to the darkest shade.
Tip: Don’t be afraid to use your fingers to blend. The warmth from your fingers can help melt the product into your skin for a seamless finish.
Quote: “Don’t be afraid to use your fingers to blend out your smoky eye. The warmth of your fingers can help to melt the product into your skin and create a seamless finish.” – Katie Jane Hughes, Makeup Artist (Source: Katie Jane Hughes Instagram: @katiejanehughes)
Step 8: Highlight the Inner Corners
To make your eyes pop, apply a highlighter or a light shimmery eyeshadow to the inner corners of your eyes. This step brightens the eyes and adds a touch of sparkle.
Quote: “Finish your smoky eye with a coat of mascara and a touch of highlighter in the inner corner of your eye to make your eyes pop.” – Hung Vanngo, Celebrity Makeup Artist (Source: Hung Vanngo Instagram: @hungvanngo)
Step 9: Apply Mascara
No smoky eye is complete without mascara. Apply several coats of mascara to your upper and lower lashes to add volume and length. If you want to go the extra mile, you can also apply false lashes for added drama.
I remember the first time I wore false lashes with a smoky eye look. It was for a friend’s wedding, and the compliments I received gave me a confidence boost that lasted the entire evening.
Step 10: Clean Up
After completing your smoky eye, clean up any fallout with a makeup remover wipe or a bit of foundation. This will ensure a sharp, clean look.
Bonus Tips for a Perfect Smoky Eye
Experiment with Colors
Don’t feel limited to the classic black or gray smoky eye. Experiment with different colors to create a unique look that suits your style and eye color.
Quote: “A smoky eye doesn’t have to be black. Experiment with browns, grays, or even jewel tones for a unique twist.” – Priscilla Ono, Global Makeup Artist for Fenty Beauty (Source: Priscilla Ono Instagram: @priscillaono)
Use Matte and Shimmer Shades
Mixing matte and shimmer eyeshadows can add dimension to your smoky eye. Use matte shades for the crease and outer corner, and add a touch of shimmer to the center of your lid or the inner corners for a bit of sparkle.
Adjust for Different Eye Shapes
Different eye shapes may require slight adjustments to the classic smoky eye technique. For hooded eyes, focus the darker shades slightly above the crease to create the illusion of depth. For round eyes, extend the eyeshadow outward to elongate the eye shape.
Quote: “A smoky eye can be adapted to any eye shape or occasion. For a daytime look, keep it soft and subtle. For a night out, amp up the drama with a bolder color and more intense blending.” – Hannah Martin, Makeup Artist & Brand Ambassador for Bobbi Brown Cosmetics (Source: Hannah Martin Instagram: @hannahmartinmakeup)
Keep Practicing
The smoky eye can be challenging for beginners, but practice makes perfect. Don’t get discouraged if your first few attempts aren’t perfect. With time and practice, you’ll get better at blending and achieving the desired intensity.
I struggled with the smoky eye technique for years, often ending up with raccoon eyes instead of a glamorous look. But with patience and practice, I finally mastered it, and now it’s my go-to look for special occasions.
The Science Behind the Smoky Eye
Studies show that eye makeup can significantly impact how others perceive you. A study published in Evolution and Human Behavior found that people perceive those with enhanced eye makeup, like a smoky eye, as more attractive and confident. Another study published in the Psychology of Women Quarterly found that wearing makeup can improve self-esteem and body image, with eye makeup having a significant impact on self-perception. This means that mastering the smoky eye can enhance not only your appearance but also your confidence.
Source: The Perception of Eye Makeup: A study published in Evolution and Human Behavior (Source: Evolution and Human Behavior)
Source: Makeup and Self-Esteem: A study published in the Psychology of Women Quarterly (Source: Psychology of Women Quarterly)
Conclusion
Creating a smoky eye doesn’t have to be intimidating. By following these step-by-step instructions and using the tips provided by expert makeup artists, you can master this timeless look. Remember, practice makes perfect, so don’t be afraid to experiment and find what works best for you.
Whether you’re getting ready for a night out or just want to add a touch of glamour to your everyday look, the smoky eye is a versatile and stunning choice. So grab your eyeshadow palette, blending brush, and get ready to create a smoky eye that will turn heads and boost your confidence. Happy blending!


